
How to cross-publish posts from Strapi with Zapier
Well, you got your new CMS up and running. You are using Strapi, like me, but you are kind of lazy, like me.
You don't want to manually share content on LinkedIn, Facebook, Medium, and other social sites. That would be way too much work.
What can you do about it? Make Zapier do it for you!
Zapier is an intuitive platform that makes it easy to connect apps that you use every day, and thankfully, it is pretty easy to connect our Strapi backend with Zapier in order to cross-post content automatically.
From my quick research, the easiest way to quickly get up and running with Zapier is to set up a Webhook that posts new content to Zapier. Zapier has an app for Webhooks that is for this purpose.
Note: the Webhooks app is a Premium app in Zapier, so in order to make this work in production, you will need to have a premium Zapier account.
First, create an account with Zapier.
If you have not already, you will want to create an account with Zapier so that you can easily manage your automation and access it later.
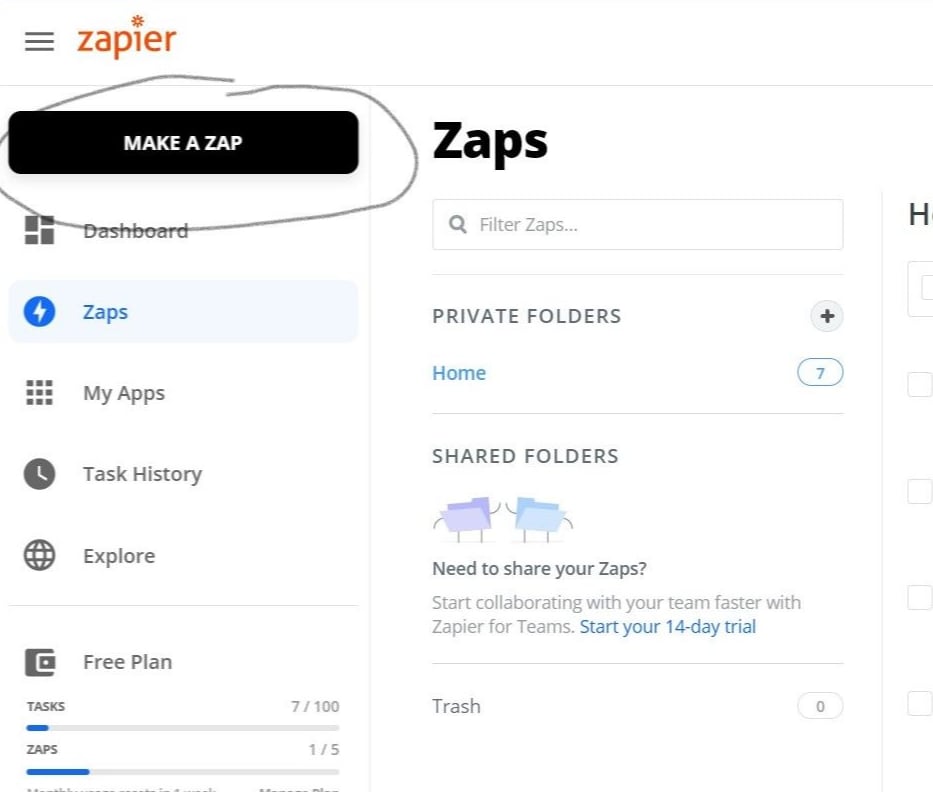
Next, Create a new Zap.
In Zapier, you will click the "My Apps" button in the top right, then click "Make a Zap" in the top left of your Zaps dashboard.
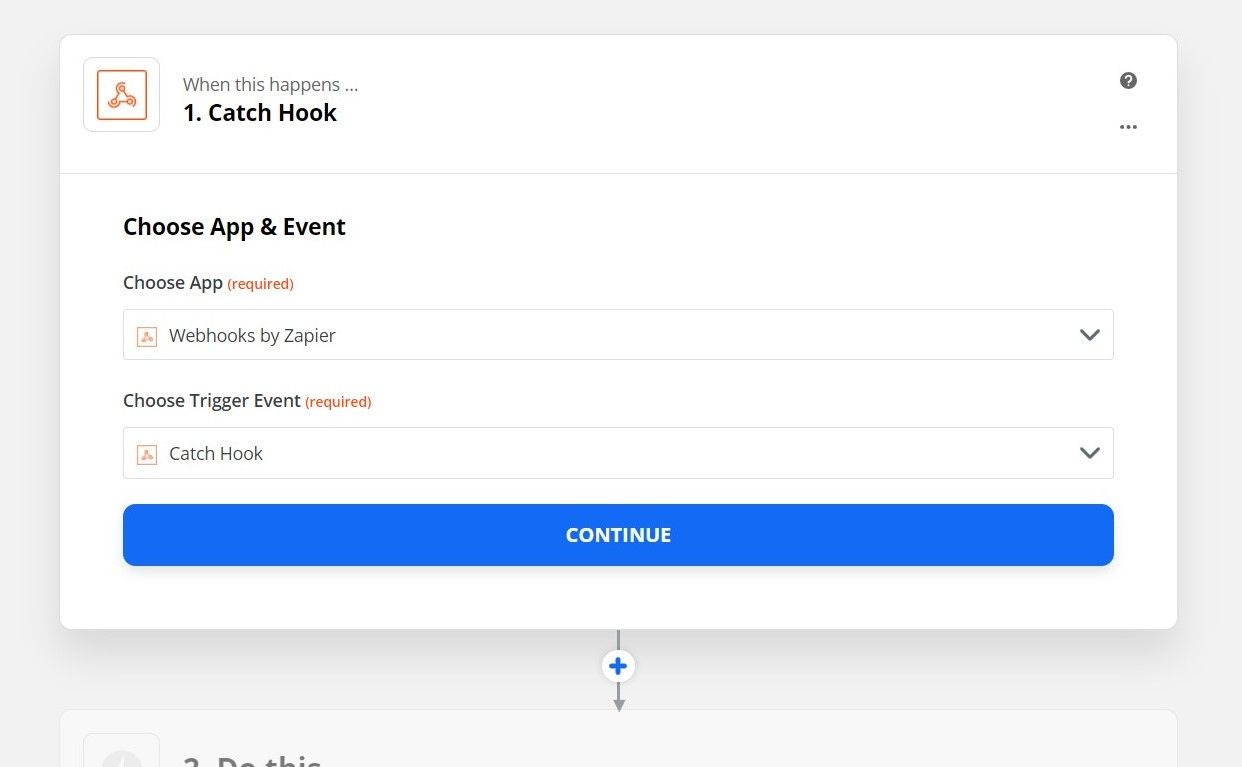
Choose App
In Zapier, you will have the option of selecting an app for your Zap. In our case, search for "Webhooks" in the search bar, and select the Webhooks app by Zapier.

Choose a Trigger event
Next, you will want to choose a trigger event for your zap. Here, select "Catch Hook". This will be the option we need to configure a webhook in Strapi.
Continue and Test
Click the continue button, and Zapier will generate a unique URL for you that we can use in our Strapi Webhook.
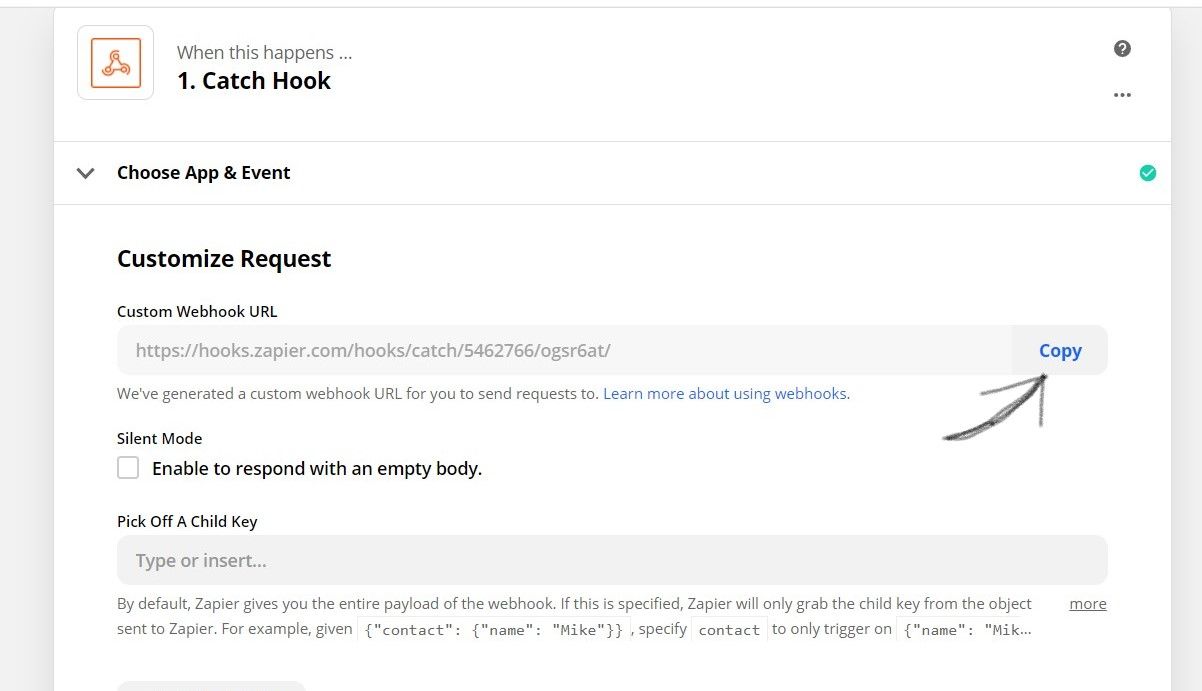
Copy the URL, then go to your Strapi admin panel. Go to Settings > Webhooks and click add a new webhook.
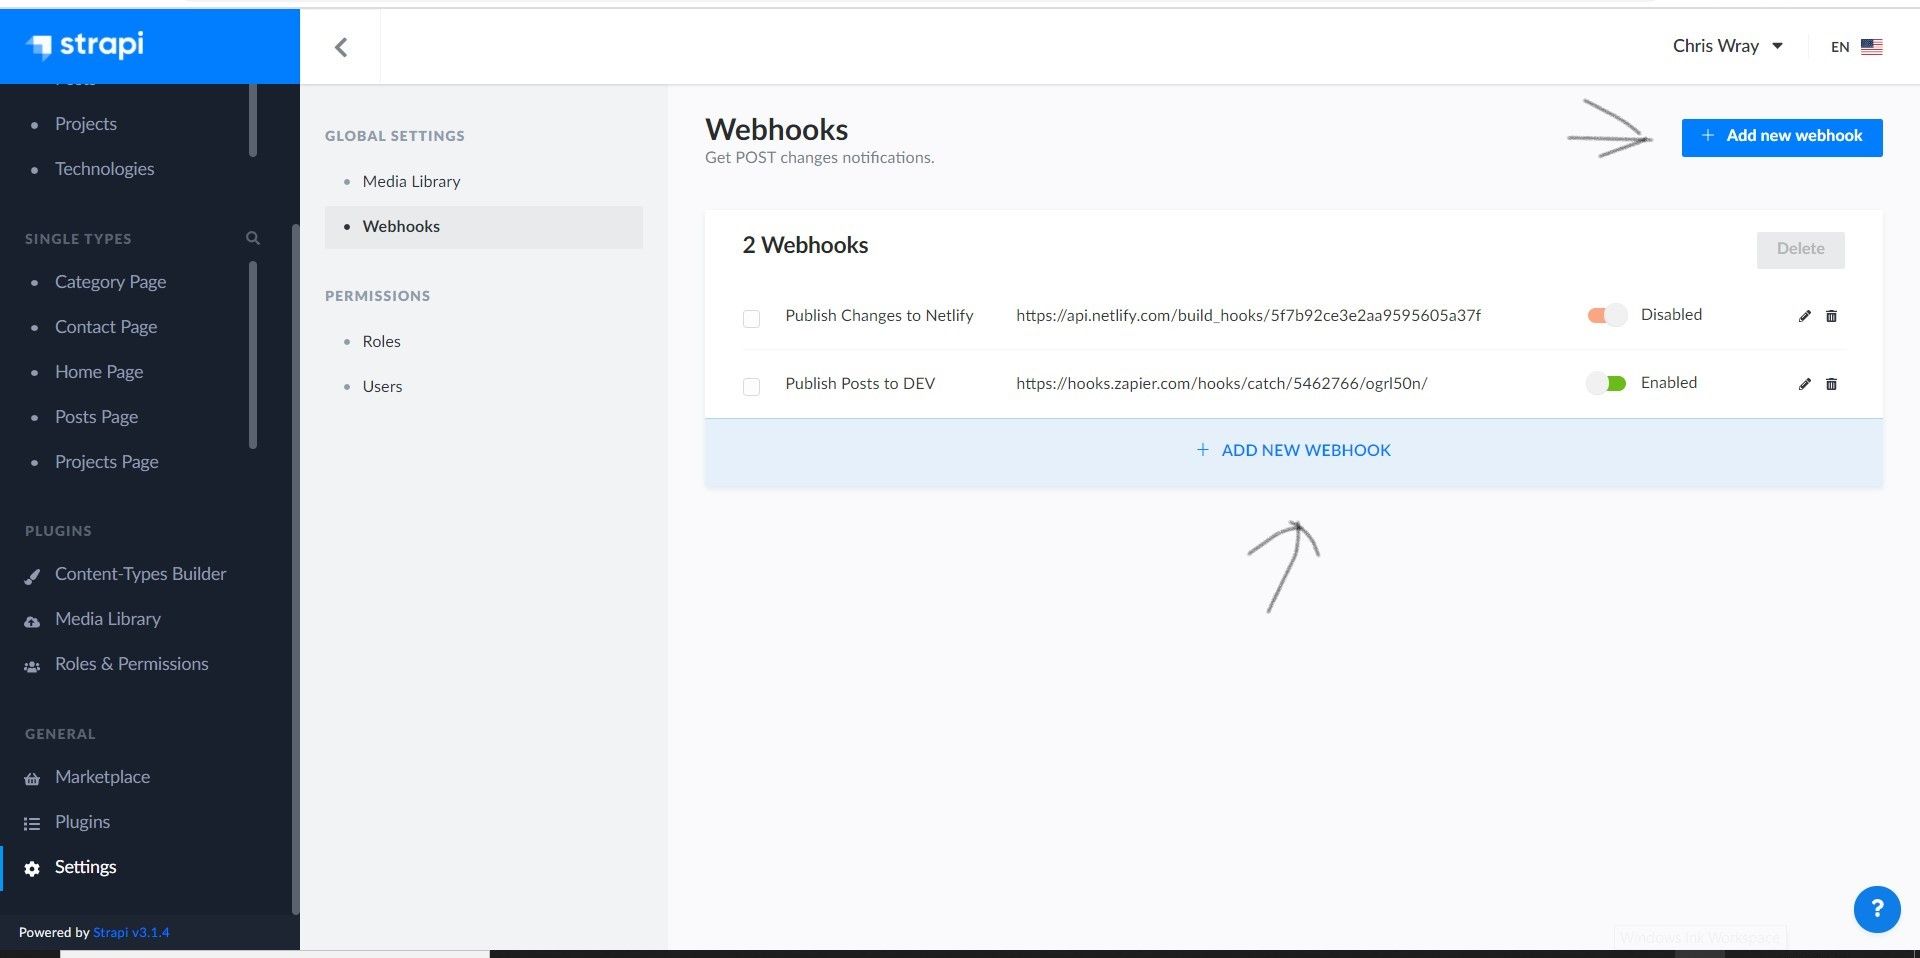
Create a Webhook in Strapi
In the webhook panel, you will need to add a memorable name for your webhook, paste in the URL from Zapier, and select the "create" option for entry. This will tell your API to post the entry details to the Zapier URL whenever you add a new content type.
Click Save.
Testing real data.
You can click the trigger button in the webhook after you have saved it in Strapi, but this will only send a small test data packet. To have more fields to choose from, add a new test data record in the collection type that you want to publish posts from automatically.
In my case, it is my "post" collection.
Once you have created a post or whatever your collection type is, go back to Zapier and click continue in the builder area.
Click "Test Data".
Once you have done that, Zapier will show you a screen that shows the content that you just created in Strapi like below:
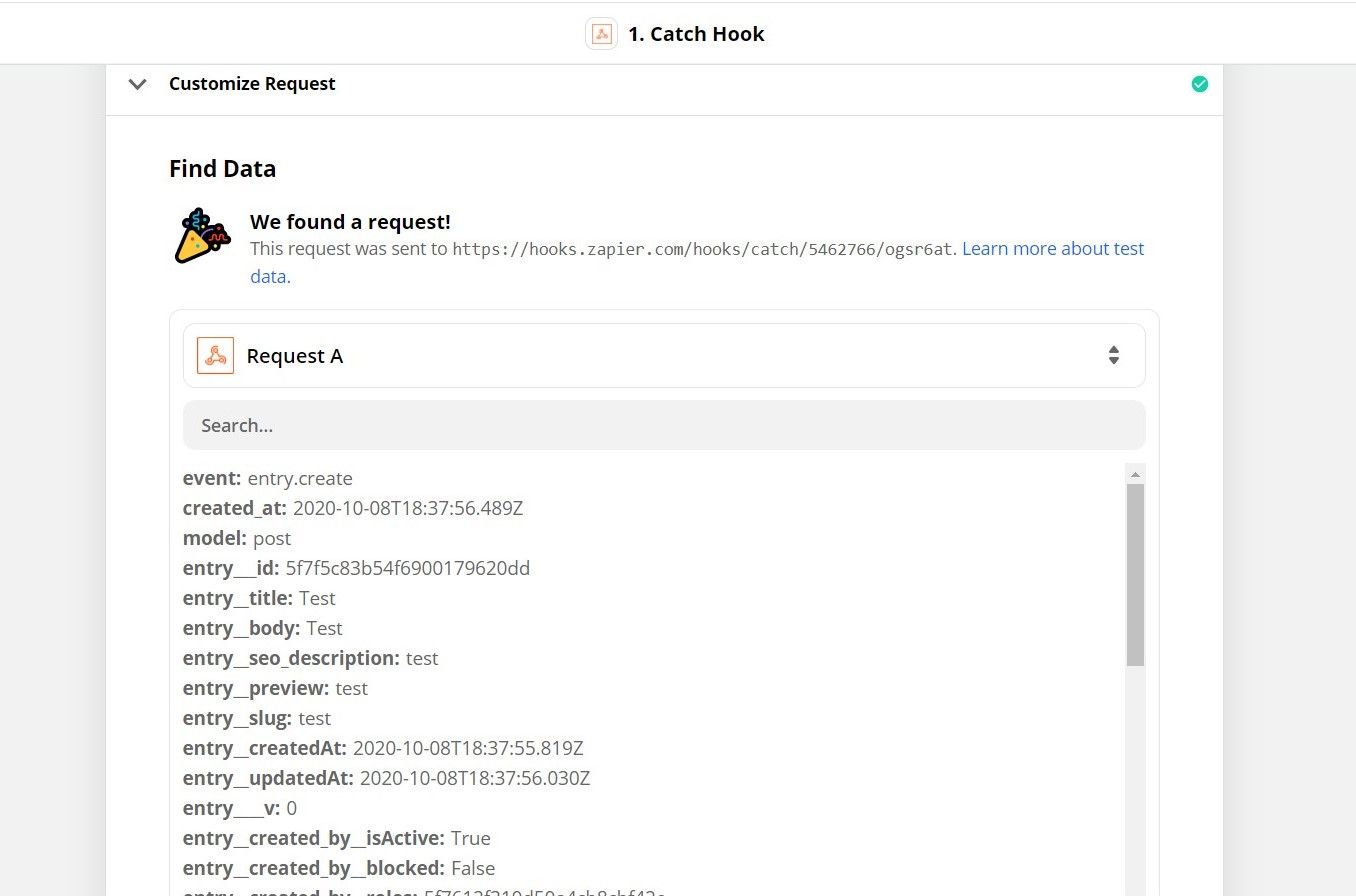
If everything looks right, click Continue.
Add a Filter
Before you select an app to publish your posts to, select the + icon to add a filter.
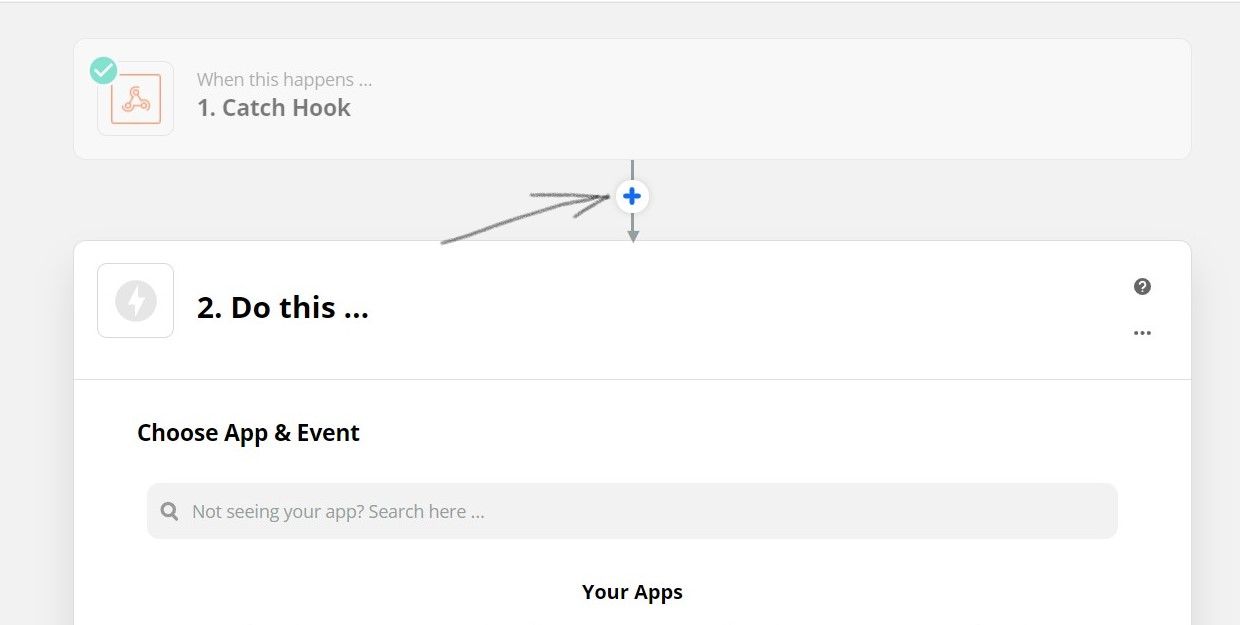
When presented with options, select the "Filter" option.
Here, is where you will want to choose to post only the content types that you want to automatically post to social media.
For me, I only want to share posts, so this is what my configuration looks like:
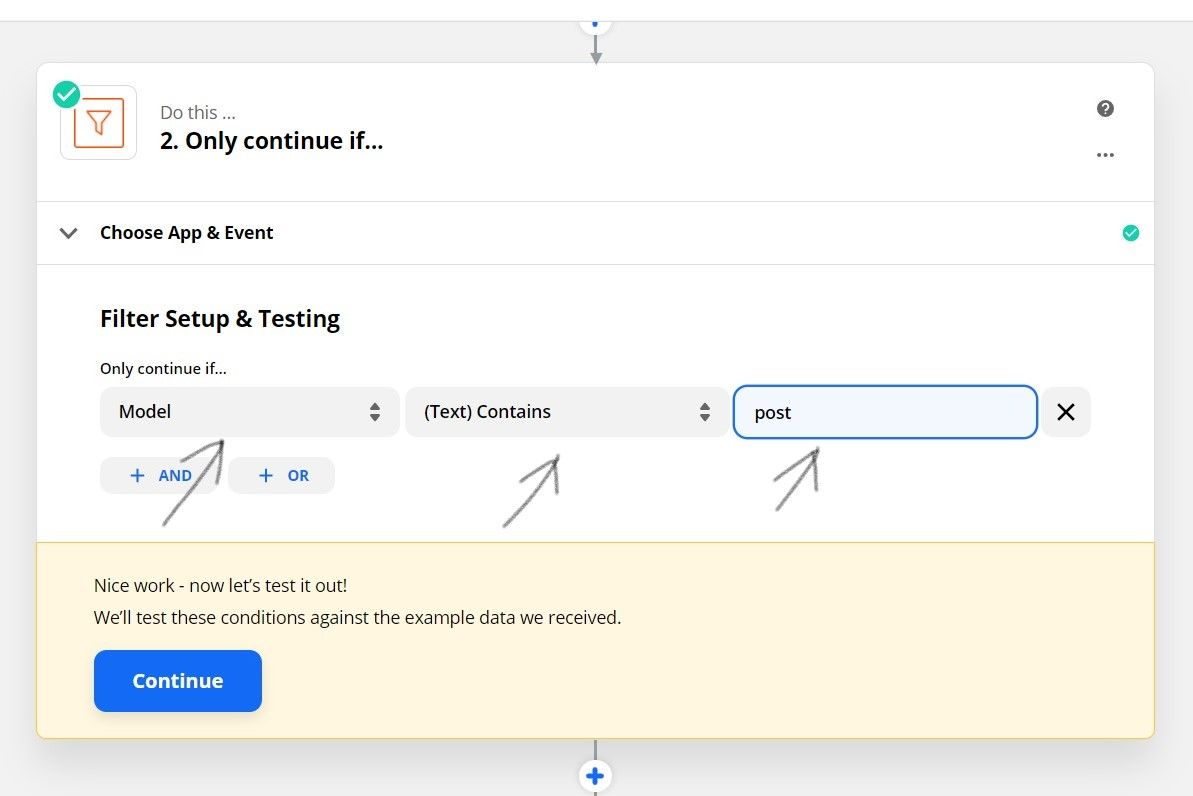
Select the "Model" field, and make sure the text contains the model that you want to post.
Click "Continue".
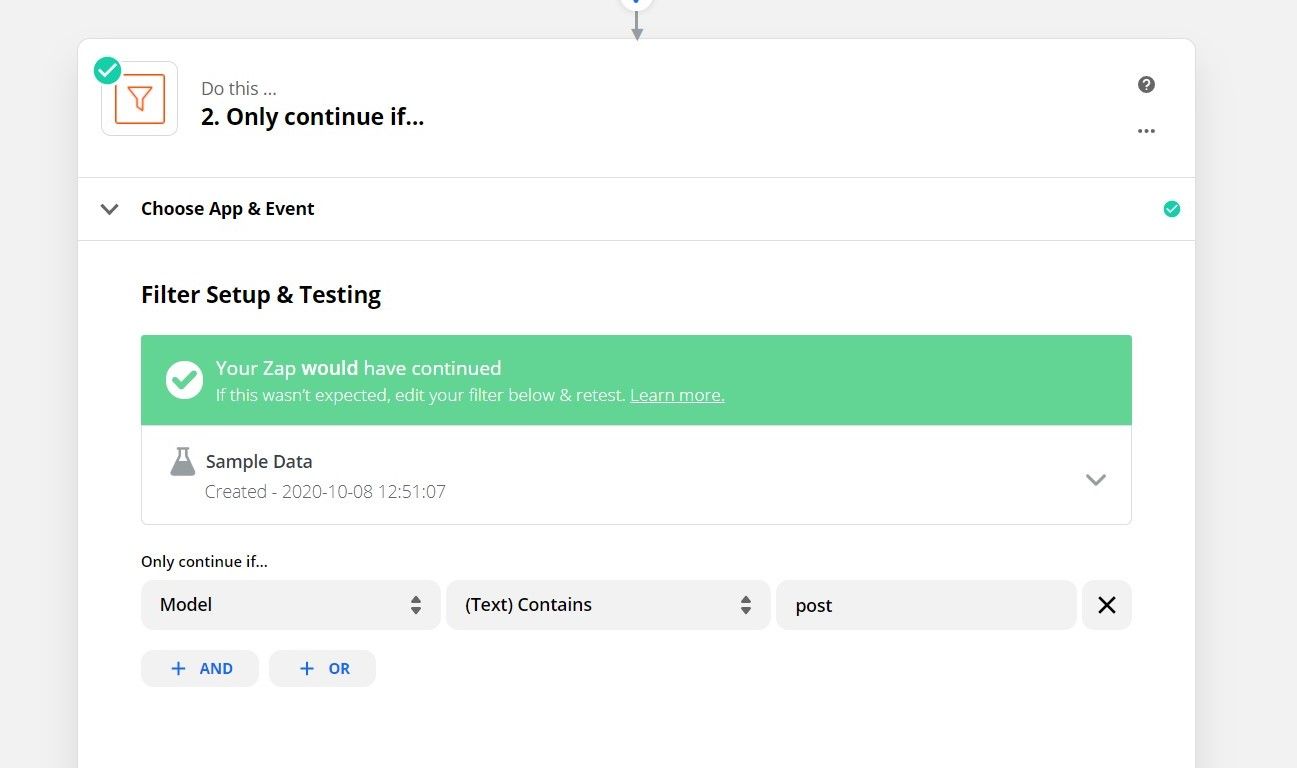
Zapier will automatically test your data. If your data went through successfully, it will show a screen similar to mine below:
Select Connecting Apps
Now, you can select an app that you want to publish your content to automatically from Strapi. Click done editing, and move to select an app.
Click "Do This".
Search for your app in the search bar. For me, I want to automatically post my content to LinkedIn, so I connected to LinkedIn, but you can choose any other app that you want to cross publish to.
This should be pretty straight forward, but you will want to give Zapier permissions to post to LinkedIn for you.
Select your Event Trigger:
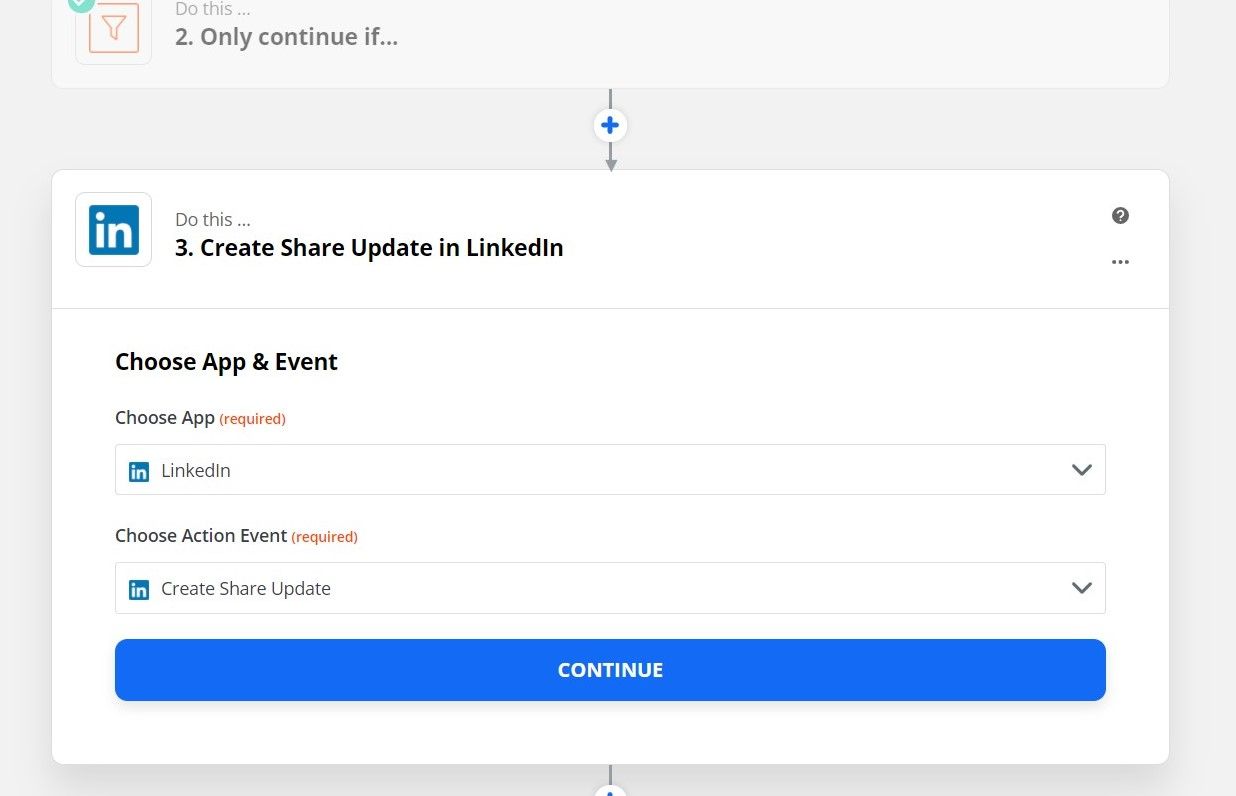
Then, click "Continue.
Choose the account that you want to share to, and click continue.
Customize your Update
You can choose fields to use when you are posting content to LinkedIn, like the content URL, image URL, and more. Here is what my configuration looks like:
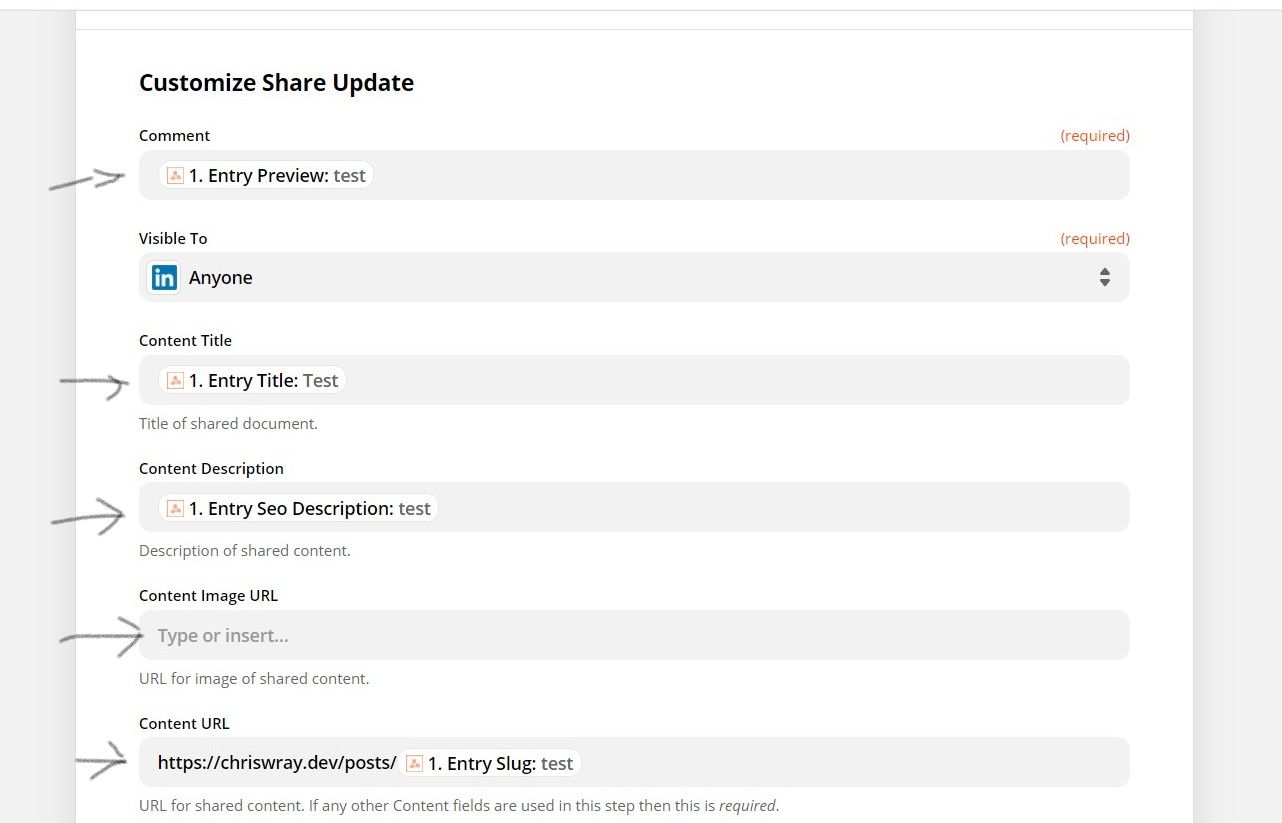
Click Continue when you have your posts configured as you would like.
Test your Post
At this point, Zapier will show you the option to send a test to LinkedIn. This will push your test data out to the public if your configuration is set that way, so make sure to go and delete it in LinkedIn if you do decide to do a test.
For me, I just decided to skip the test.
Turn on your Zap!
Now, all you have to do is turn on your Zap and Zapier will start doing all that work for you.
Thanks so much for reading and I hope this is helpful!

Trying to do my part in making the world a better place.
This site is hosted for free, so I am thanking the services I am using by adding a link to their websites here in the footer.
More
This Site
© 2020 Chris Wray. All rights reserved.